Monday 23 March 2015

Aviation Theme Birthday Party


Hi Friends,

I wanted to drop a quick line and share some photos of my sons Aviation Themed B’day Party.

I have to say even though as the host I was running around overwhelmed trying to get things it was still fun! And of course my son and his friends had loads of fun.

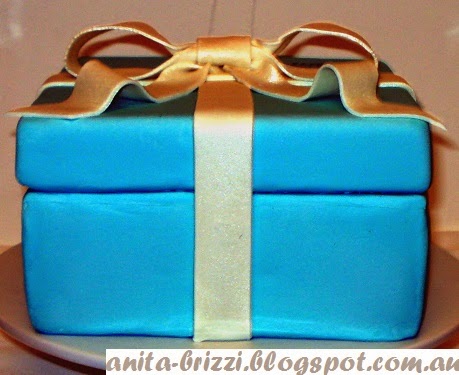
Here are photos of the invites, cake, hat and goggles I made. Using the templates from the links below I created my own invites, made the hats and goggles for all the kids and prepared some fun games (which we didn't play) but would have been fun! 


I could not find a tutorial for the plane topper on the cake so I had to make it up slightly following the Wilton Tutorial which was only a little helpful. I am really happy with the way it turned out. Unfortunately I didn’t take photos for a tutorial as I was short on time :( If you do intend on making your own plane topper be sure to allow for drying times and if you have any questions I am more than happy to help!


Enjoy 
Anita xx

Saturday 27 December 2014

New Wooden Signs


Hi Friends, 
Just a few pictures of some of my most recent new signs. Some have been sold and some are still available on my Etsy store, which you can visit by clicking on the link above. This year I also have prints, singlets and jewellery available. Hope you like :) 


Enjoy the holidays 
Anita xx


Sunday 21 December 2014

Baby Shower Cake


Hi Friends,

It has been busy few months with my newborn baby, the craft fair and other things happening in our lives, but last week I was happy to have a little creative outlet make a baby shower cake.

I always love cake decorating because you never know the result until you get closer to the end and it is always rewarding. This cake was pretty easy and would have taken no more than a few hours to put together and decorate, however I was decorating in between my crying baby so my few hours was bit spread out over two days.

I do have to admit I took a lot of shortcuts. I wanted to avoid going to the shops with my little one so I mostly made do with what I had in my pantry and considering I was pleased with results.

Here are a few tips and pictures on make the cubes:

I cooked a simple coconut cake mixture in 3”x3”x3” tins.
I separated the fondant in three pieces and left one piece white, while colouring the other two in light pink and light blue colour.
I rolled the fondant and as I didn’t have a square cookie cutter, I used the cake tin to give me an outline which I cut with a knife.
I recommend letting the fondant set on the cubes for a couple of hours.
Using white fondant I cut some strips. I was a bit lazy to take out my rollers which 
would give me exact strips, instead I just cut them using a knife measuring by eye.
I also recommend letting the strips set just for a few minutes as they would be easier to attach to cake.

I then glued the strips on the cubes and let them set while I prepared footprints, numbers and stars to decorate the cubes.

I positioned the cubes on the cake and the cake board and finished it off with some cute booties.


And just cause I had cupcakes I thought may as well do something with them so I created the shape of a pram. Well at least it looks slightly like one ;)


Merry Christmas

Anita x

Tuesday 25 November 2014

New Necklaces & Singlets on Etsy


Hi Friends,

I just wanted to share some of my most recent work that I have added on my Etsy shop.

The last year I have wanted to branch out and try my creativity in other areas, so besides wooden signs I have tried my hand at necklaces and clothing with Bible verses texts.

I hope next year to expand a little more as I have other creative ideas I would like to try.

As a family we have been facing ongoing personal situation but it has been during this time I felt inspired by the word of God and His wonderful promises. So I hope you enjoy them as much I do. J

I have designed singlets for night wear or day wear and necklaces so we are constantly reminded not to fear or worry during the testing times.


Also they make great ideas for Christmas so if you are interested take at look by clicking on my etsy tab up above or following this URL. www.etsy.com/au/shop/InspiredPassions


Faith
Hope
Love
WILL LAST
FOREVER
1 Corinthians 13.13
Have a great rest of the week
Anita x

Sunday 29 June 2014

Tiffany & Co. Cake: A few how to tips


Hello Monday

A while ago I trialed a Tiffany & Co cake and I almost nailed it. Unfortunately at that time I couldn't find any online tutorials so it was a bit of a guessing game plus trial and error. My mistake was that I covered the top half of the cake with fondant to create the lid and instead of cutting the excess of fondant off after I placed it on the base of the cake I tucked the excess fondant under the lid. This made the lid look uneven after I placed it on the base of the cake, so it just doesn't look right. Needless to say I learnt from my mistake and got it figured out for next time. J

Here are a few tips on what I did figure out first go.
  • I coloured white fondant mixing an aqua green and a blue colour until I had the right consistency in colour. I copied the colour of a Tiffany & Co. box I had.
  • I used two square 8 inch cakes one for the base and the other one I cut in half to use as the lid.
  • I covered the base with fondant and let it set and then covered the cake for lid with fondant. As I mentioned I tucked the excess fondant under the lid, rather cutting the excess fondant off with a knife once the lid was placed on the base of the cake.
  • I let them both set overnight.
  • I also made the bow the same night. I rolled bits of paper towel and put them in bow and under the loops of the ribbon while it dried overnight.
  • The next day I cut some white fondant to make the ribbon.
  • I sprayed the ribbon and bow with an edible pearl spray and let that dry for few minutes.
  • Using gum paste I glued the ribbon and bow on the cake.
  • For the Tiffany & Co. writing, I just used word document to create a mirror image which I printed on a piece of paper.

  • I copied the writing from the printout onto parchment paper.

  • I lightly pressed the parchment paper on the cake and used edible ink to trace the writing on the fondant.
  • Using edible black gel with a fine brush I painted the letters. The black gel can take days to dry so try not to touch it and smudge it like me! J


Love is more than a feeling. It is about choosing to treat people the way you would want to be treated.
Nicky Gumbel

Happy Week

Anita x